Install and Get Started: RAG and Context Engineering
There are two ways to get started with RapidFire AI for RAG/Context Engineering:
Google Colab - Zero local setup, takes under 2 minutes to get started. However, this option has limitations due to the free T4 GPU instance, viz., it works only for smaller models and small datasets.
Full Installation - Complete setup with full functionality for any environment (local machine or cloud machine), supporting models and datasets of any size, as well as your own OpenAI keys.
Choose the option that best fits your needs below.
Google Colab
Try RapidFire AI RAG instantly in your browser with our pre-configured Google Colab notebook. No installation required.
Launch the notebook: RapidFire AI RAG on Google Colab
Note
The Google Colab environment is limited to small models and datasets due to their free resource constraints.
Full Installation
To install RapidFire AI for RAG/context engineering on your local machine or remote/cloud instance for complete functionality without limitations, follow the steps below.
Note that if you plan to use only OpenAI APIs and not self-hosted models (for embedding or generation), you do NOT need GPUs on your machine. But you must provide a valid OpenAI API key via a config argument as shown in the GSM8K and SciFact tutorial notebooks.
Step 1: Install dependencies and package
Obtain the RapidFire AI OSS package from pypi (includes all dependencies) and ensure it is installed correctly.
Important
Requires Python 3.12+. Ensure that python3 resolves to Python 3.12 before creating the venv.
python3 --version  # must be 3.12.x
python3 -m venv .venv
source .venv/bin/activate

pip install rapidfireai

rapidfireai --version
# Verify it prints the following:
# RapidFire AI 0..14.0

# Due to current issue: https://github.com/huggingface/xet-core/issues/527
pip uninstall -y hf-xet
The tutorial notebooks for RAG evals do not use any gated models from Hugging Face. If you want to access gated models, provide your Hugging Face account token. For more details on that, see Step 1 here.
Step 2: Initialize and start RapidFire AI server
Run the following commands to initialize rapidfireai to use the correct dependencies for RAG evals:
rapidfireai init --evals
# It will install specific dependencies and initialize rapidfireai for RAG evals
Note
You need to run init only once for a new venv or when switching GPU(s) on your machine. You do NOT need to run it after a reboot or for a new terminal tab.
Next start RapidFire AI services: the frontend with the ML metrics dashboard and the API server. The frontend URL shown below can be opened on your local browser.
rapidfireai start
# It should print about 50 lines, including the following:
# ...
# RapidFire Frontend is ready
# Open your browser and navigate to: http://0.0.0.0:8853
# ...
# Press Ctrl+C to stop all services
Important
Do NOT proceed until the start is successful with “Available endpoints” printed as above. Leave this terminal running while you work through the tutorial notebooks.
If you close the terminal in which you started rapidfireai or if you rebooted your machine, just start rapidfireai again with the above command.
If the start command fails for whatever reason, wait for half a minute and rerun it. For diagnostics and common fixes (including Linux/macOS and Windows steps), see Troubleshooting.
Note
For RAG/context engineering experiments with run_evals(), starting the server is optional and only needed if you want to see results on the ML metrics dashboard too. Just as results are shown in an in-notebook table too, IC Ops panel can be displayed in the notebook too, as illustrated below (Steps 5 and 6).
Step 2b (optional): Forward ports if using remote machine
If you installed rapidfireai on a remote machine (e.g., on a public cloud) accessed via ssh, you also need to forward the following port on your client machine. Run the following ssh command with your correct username and remote machine IP. (Or forward the port via your VSCode or other IDEs.)
ssh -L 8850:localhost:8850 username@remote-machine
ssh -L 8851:localhost:8851 username@remote-machine
ssh -L 8853:localhost:8853 username@remote-machine
Step 2c (optional): Change the dashboard for visualization
By default RapidFire AI logs metrics plots in MLflow format and displays them automatically in its own MLflow-fork dashboard. The dashboard URI is printed when the server is started; open it in a browser. As of this writing, RapidFire AI also supports TensorBoard and Trackio for logging metrics.
Specify any one, two, or all three dashboards to use with the following server start argument. Support for other popular dashboards such as Weights & Biases and CometML is coming soon.
rapidfireai start --tracking-backends [mlflow | tensorboard | trackio]
Alternatively, set the dashboard using its environment variable as below in your python code/notebook:
os.environ["RF_MLFLOW_ENABLED"] = "true"
os.environ["RF_TENSORBOARD_ENABLED"] = "true"
os.environ["RF_TRACKIO_ENABLED"] = "true"
Step 3: Download the tutorial notebooks
Only after completing Step 2, download the example tutorial notebooks (explained further here: Example Use Case Tutorials). You can also see them in the “tutorial_notebooks” folder under the directory where you initialized rapidfireai. Right click on the GitHub link to save that file locally.
FiQA: RAG for Financial Opinion Q&A Chatbot: View on GitHub
GSM8K: Context Engineering for Math Reasoning: View on GitHub
SciFact: RAG for Scientific Claim Verification: View on GitHub
Quickstart Video (3.5min)
Full Usage Walkthrough Video (13.5min)
Step 4: Run the notebook cells
Run the cells one by one as shown in the above videos. Wait for a cell to finish before running the next.
Imports
Load datasets
Create named RF experiment
Define RF RAG spec that wraps LangChain classes
Define data preprocessing and post processing functions
Define eval metrics functions per batch and for accumulation
Define RF generator spec that wraps vLLM or OpenAI classes
Define rest of multi-config knob dictionary and generate config group
Launch multi-config evals; adjust
num_shardsas per desired concurrency (see Run Evals for details)
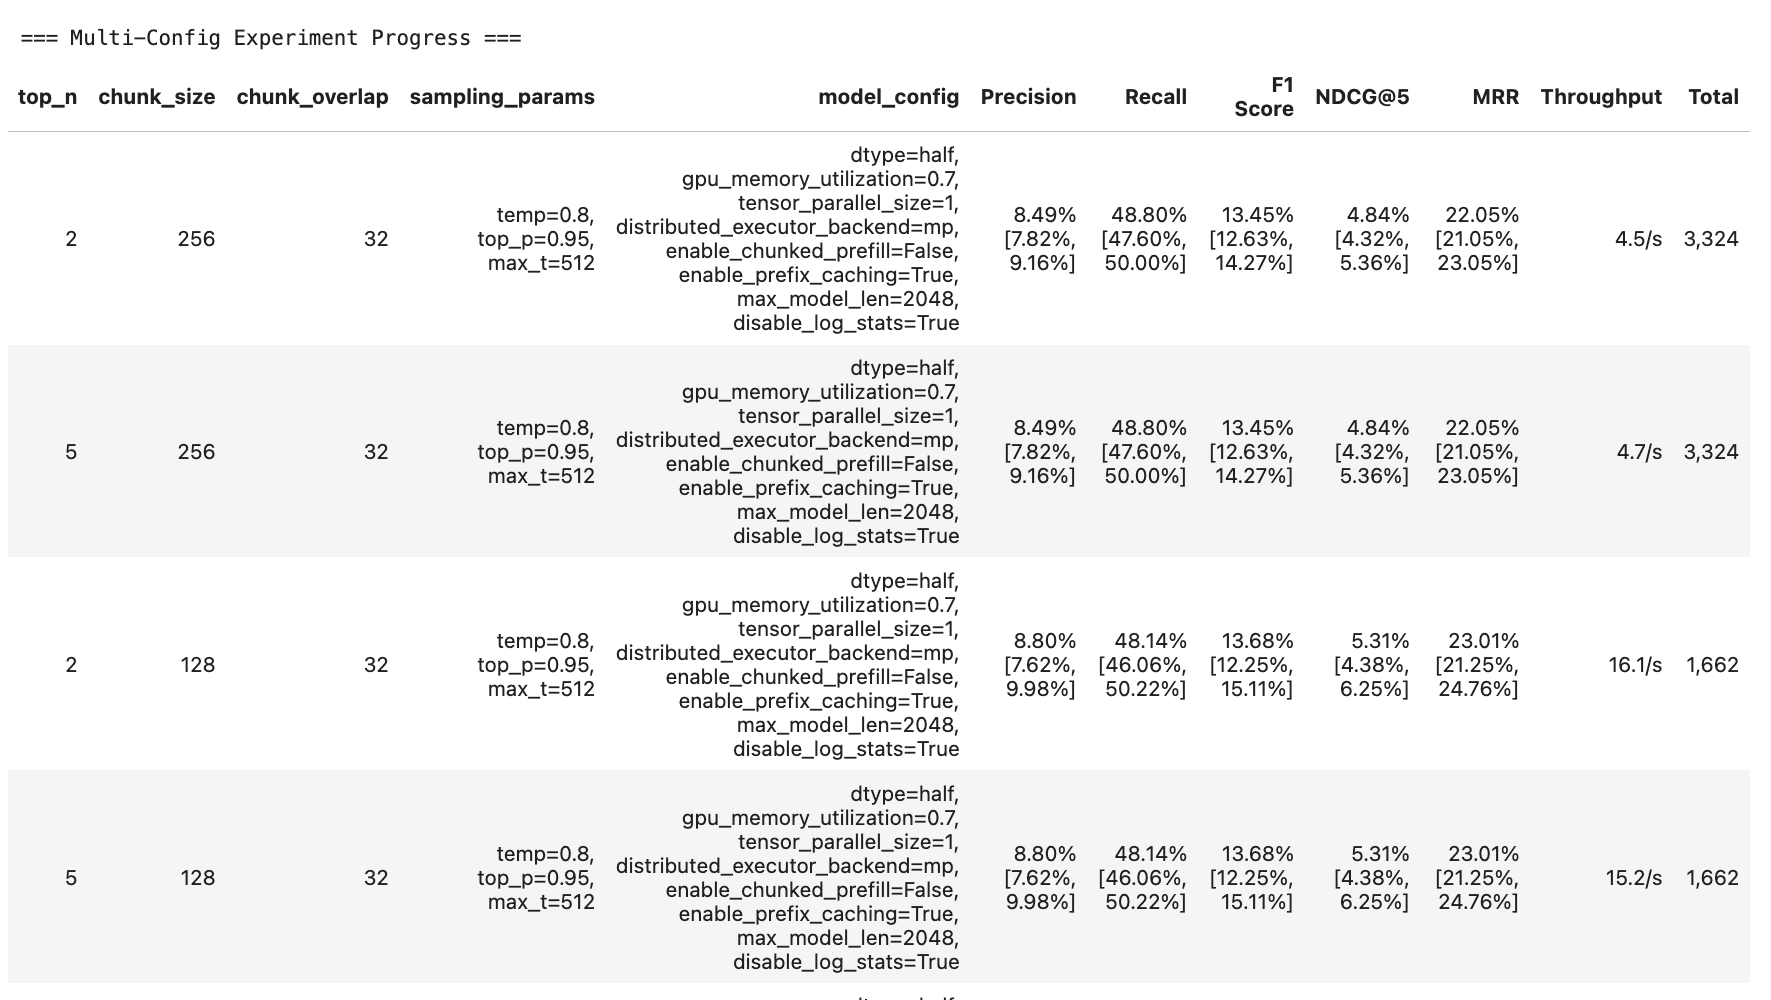
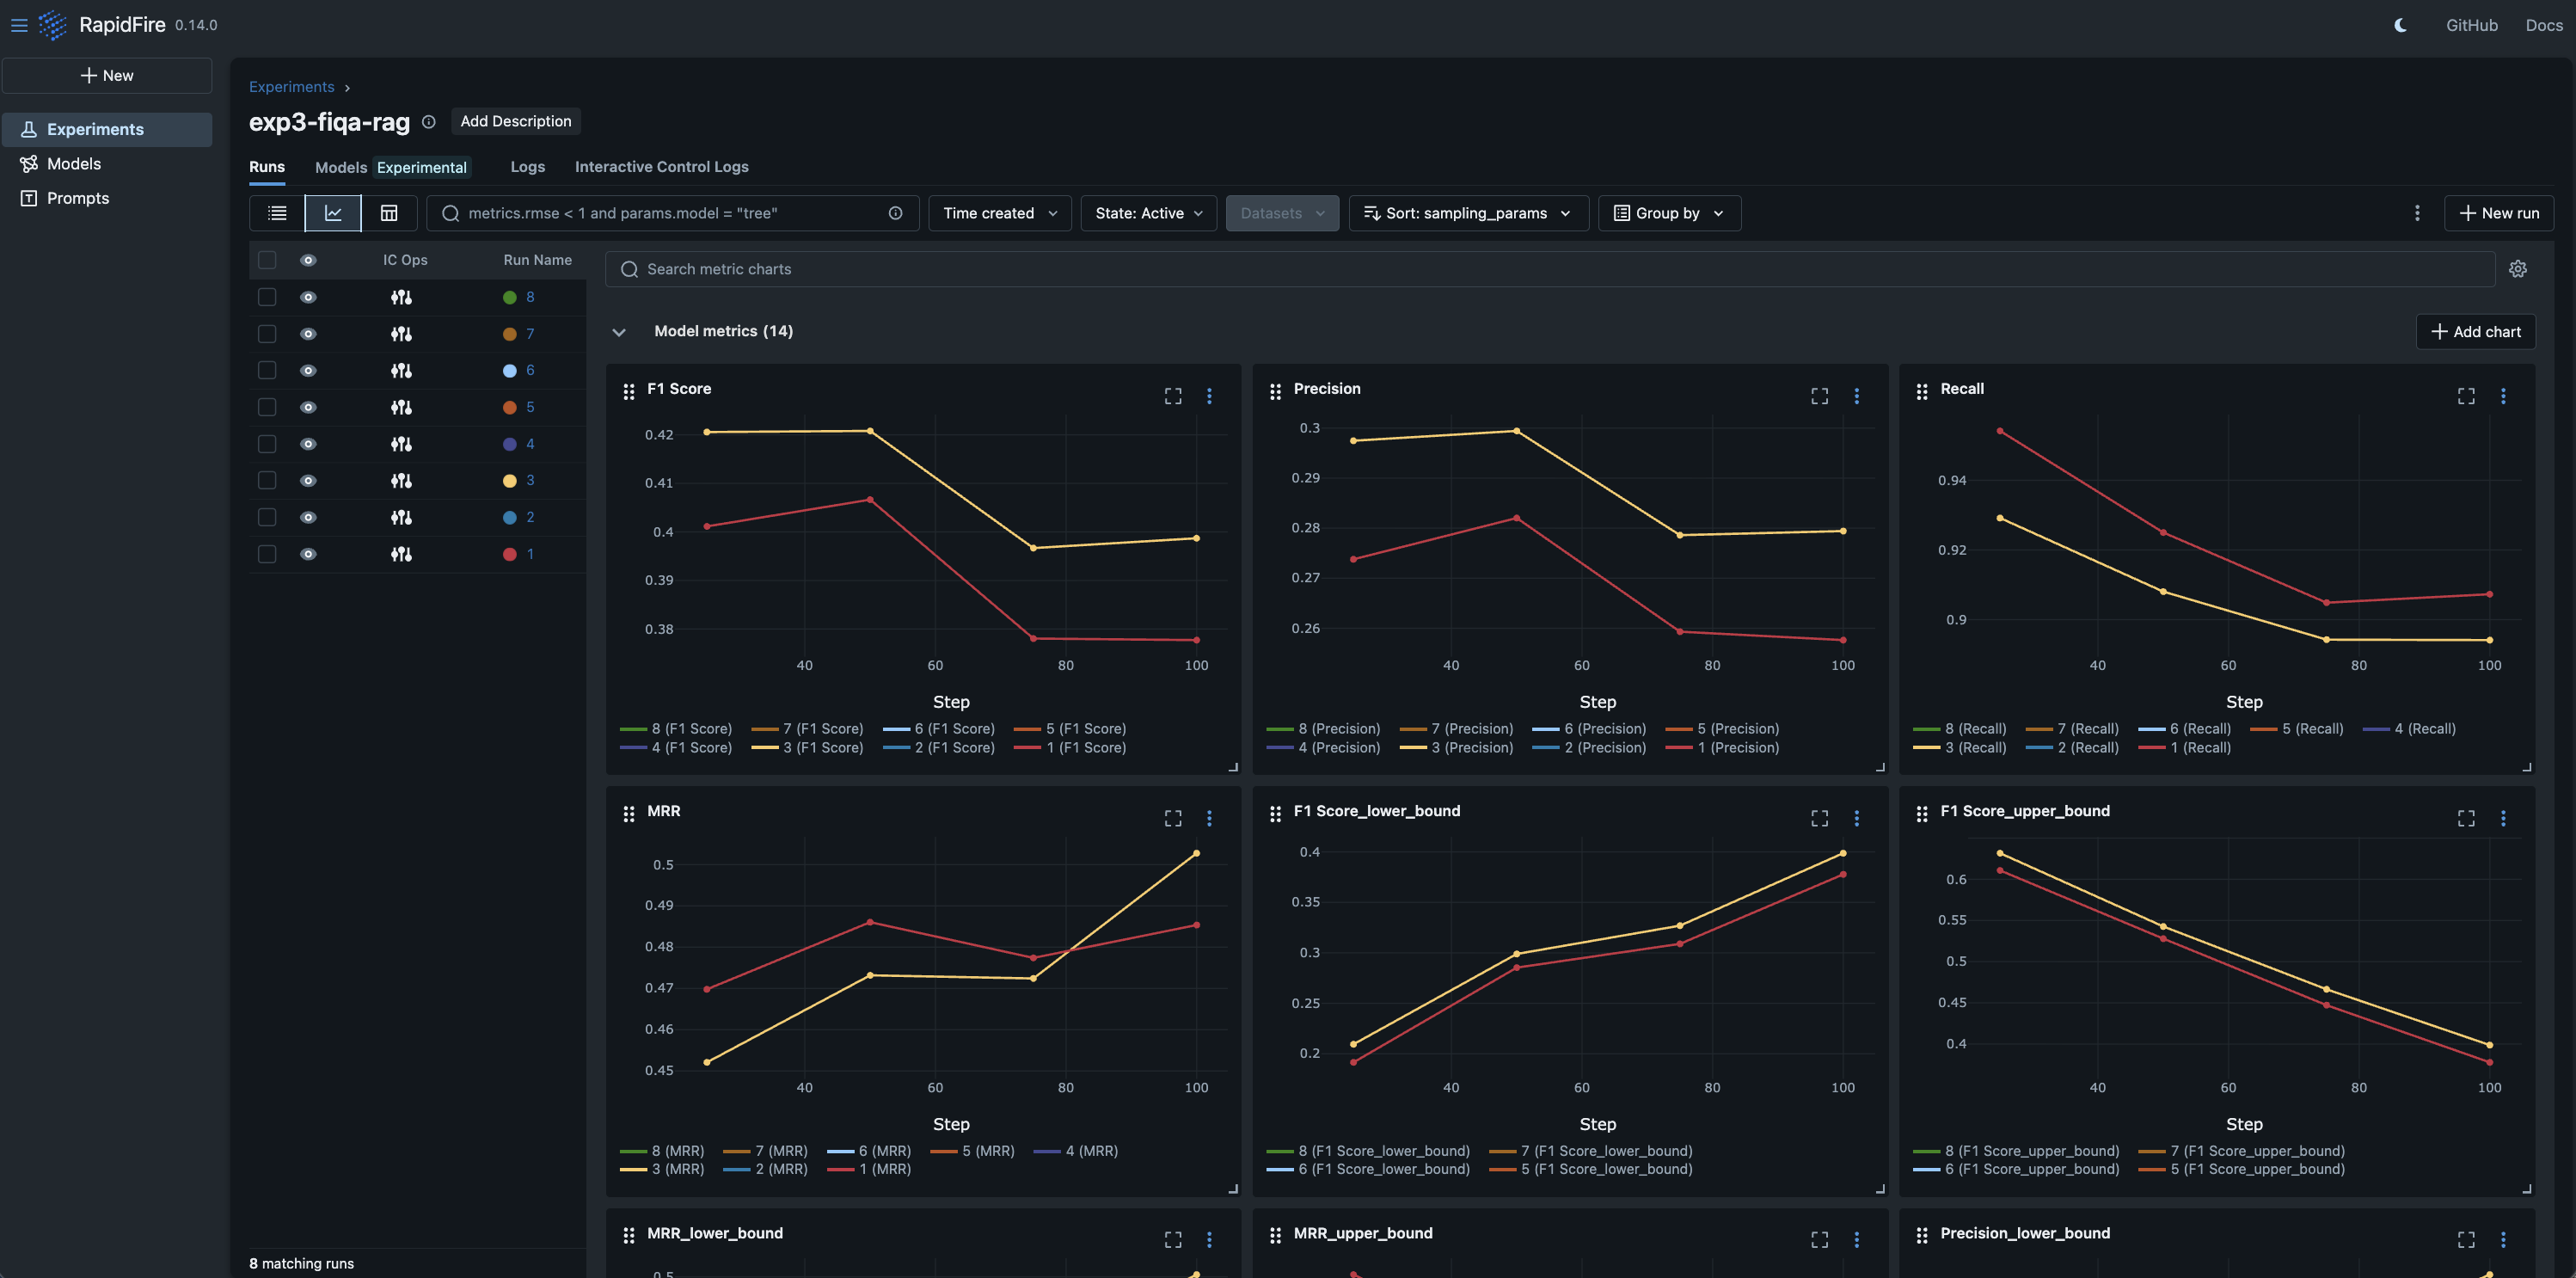
Step 5: Monitor online aggregation of eval metrics on in-notebook table and/or ML metrics dashboard
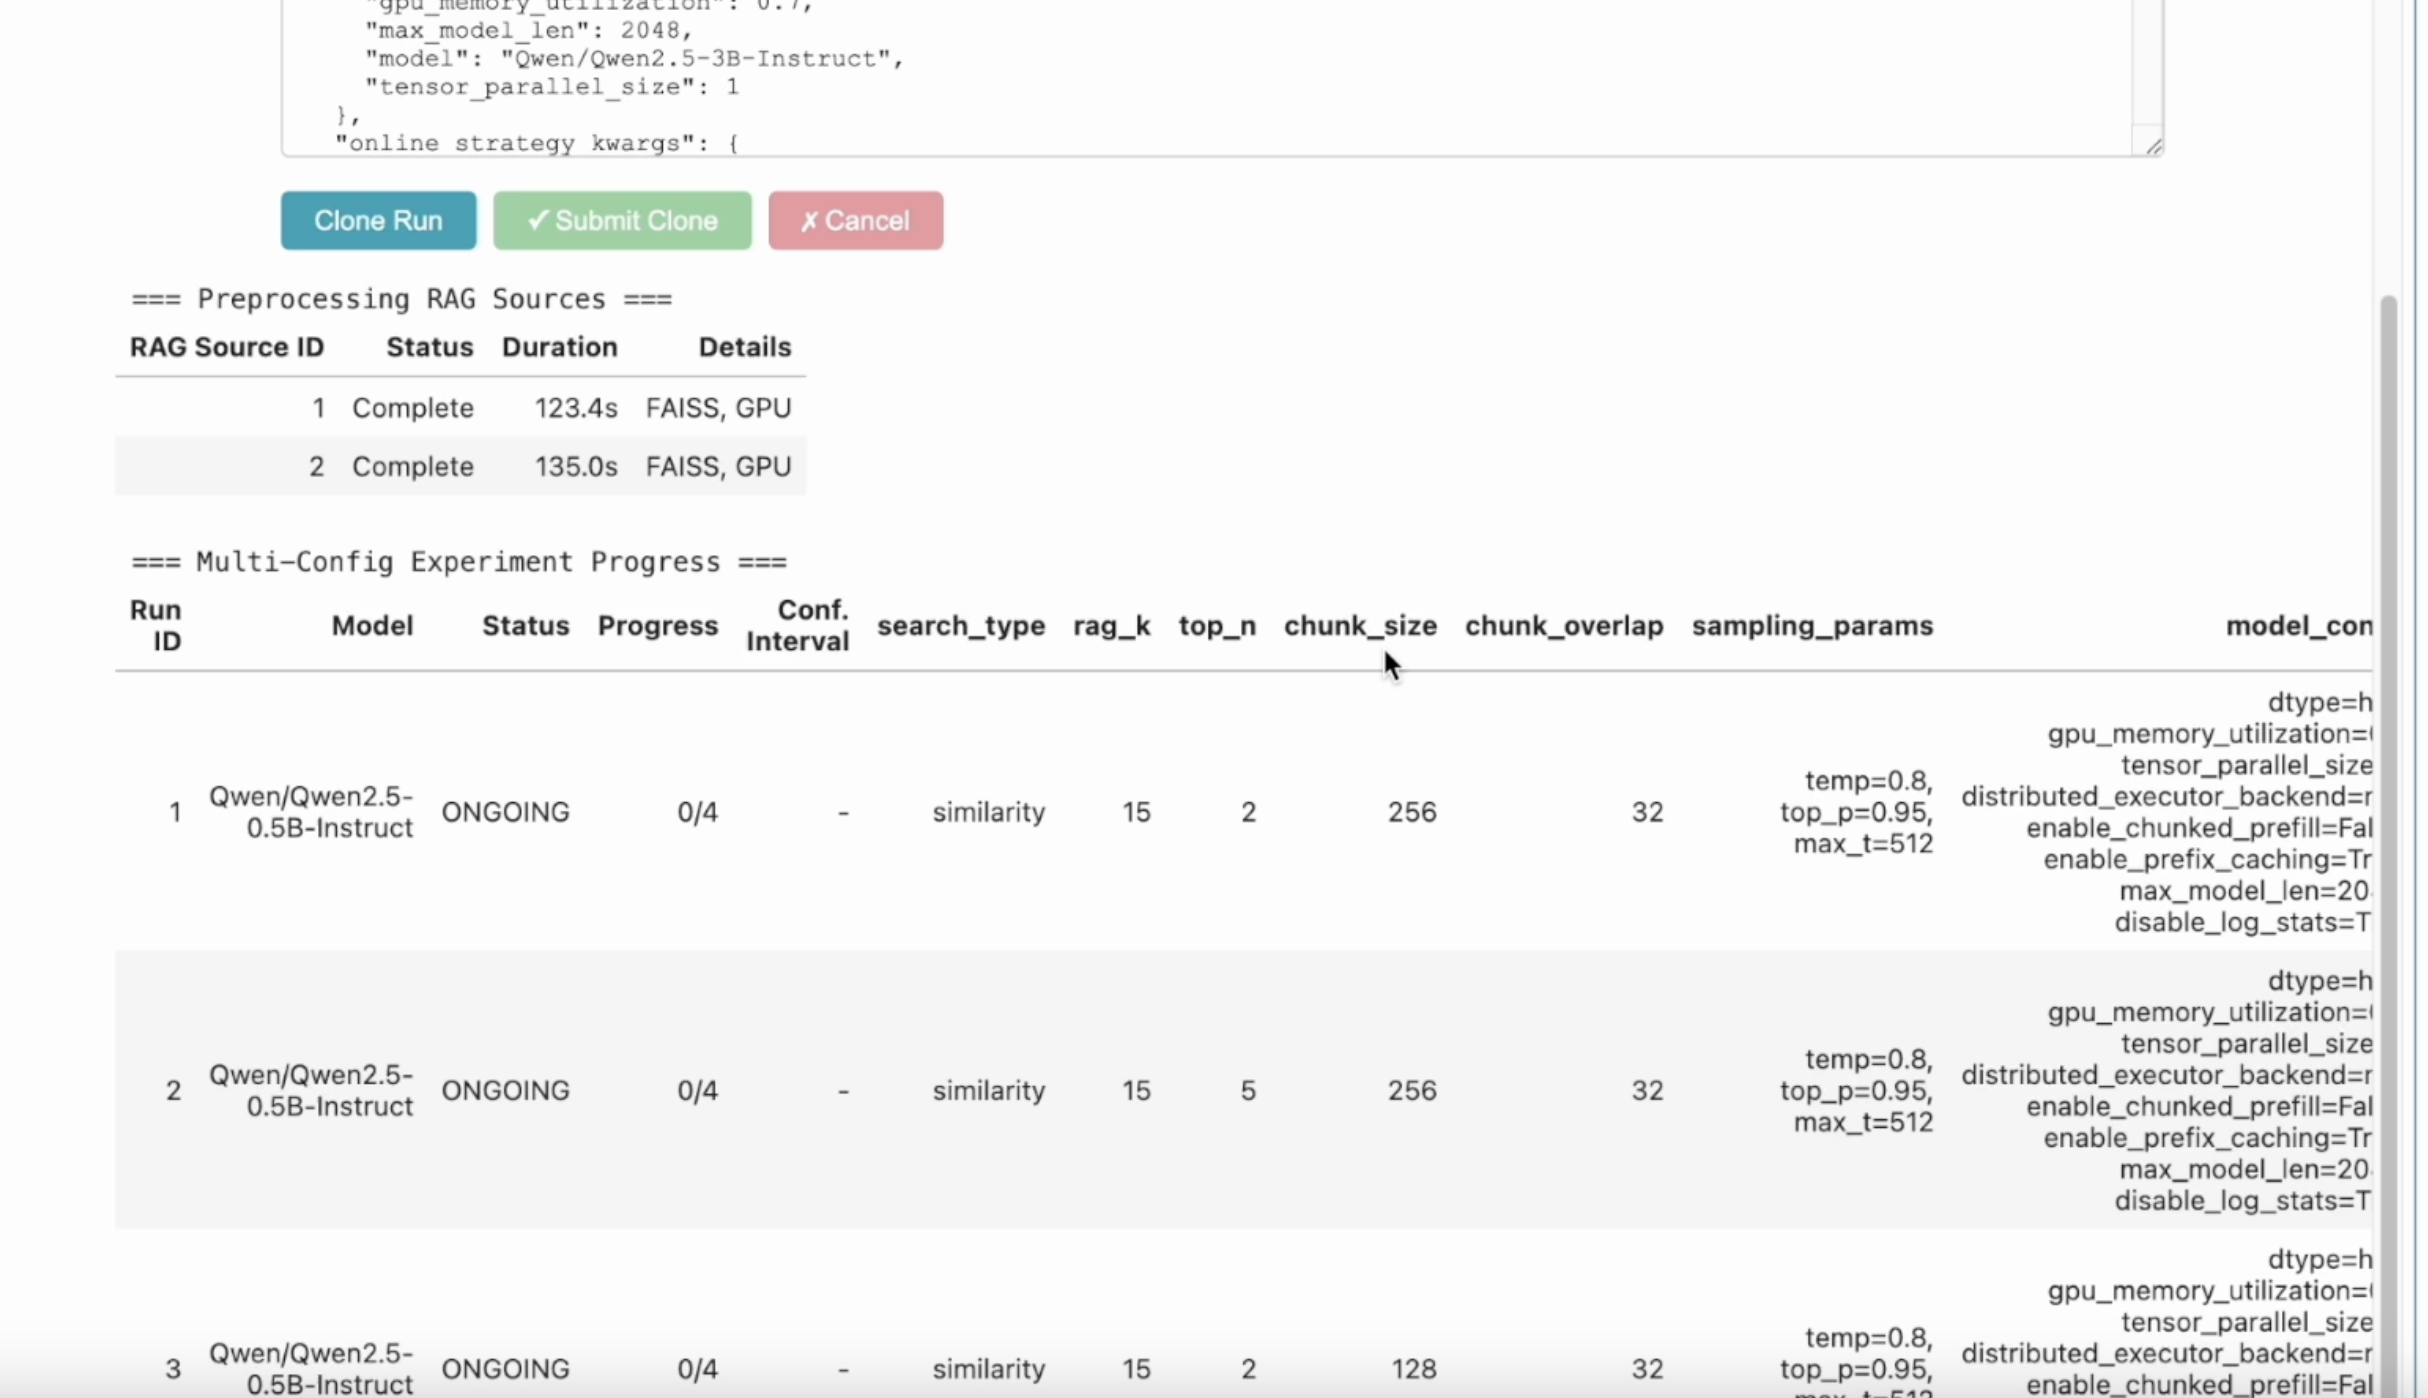
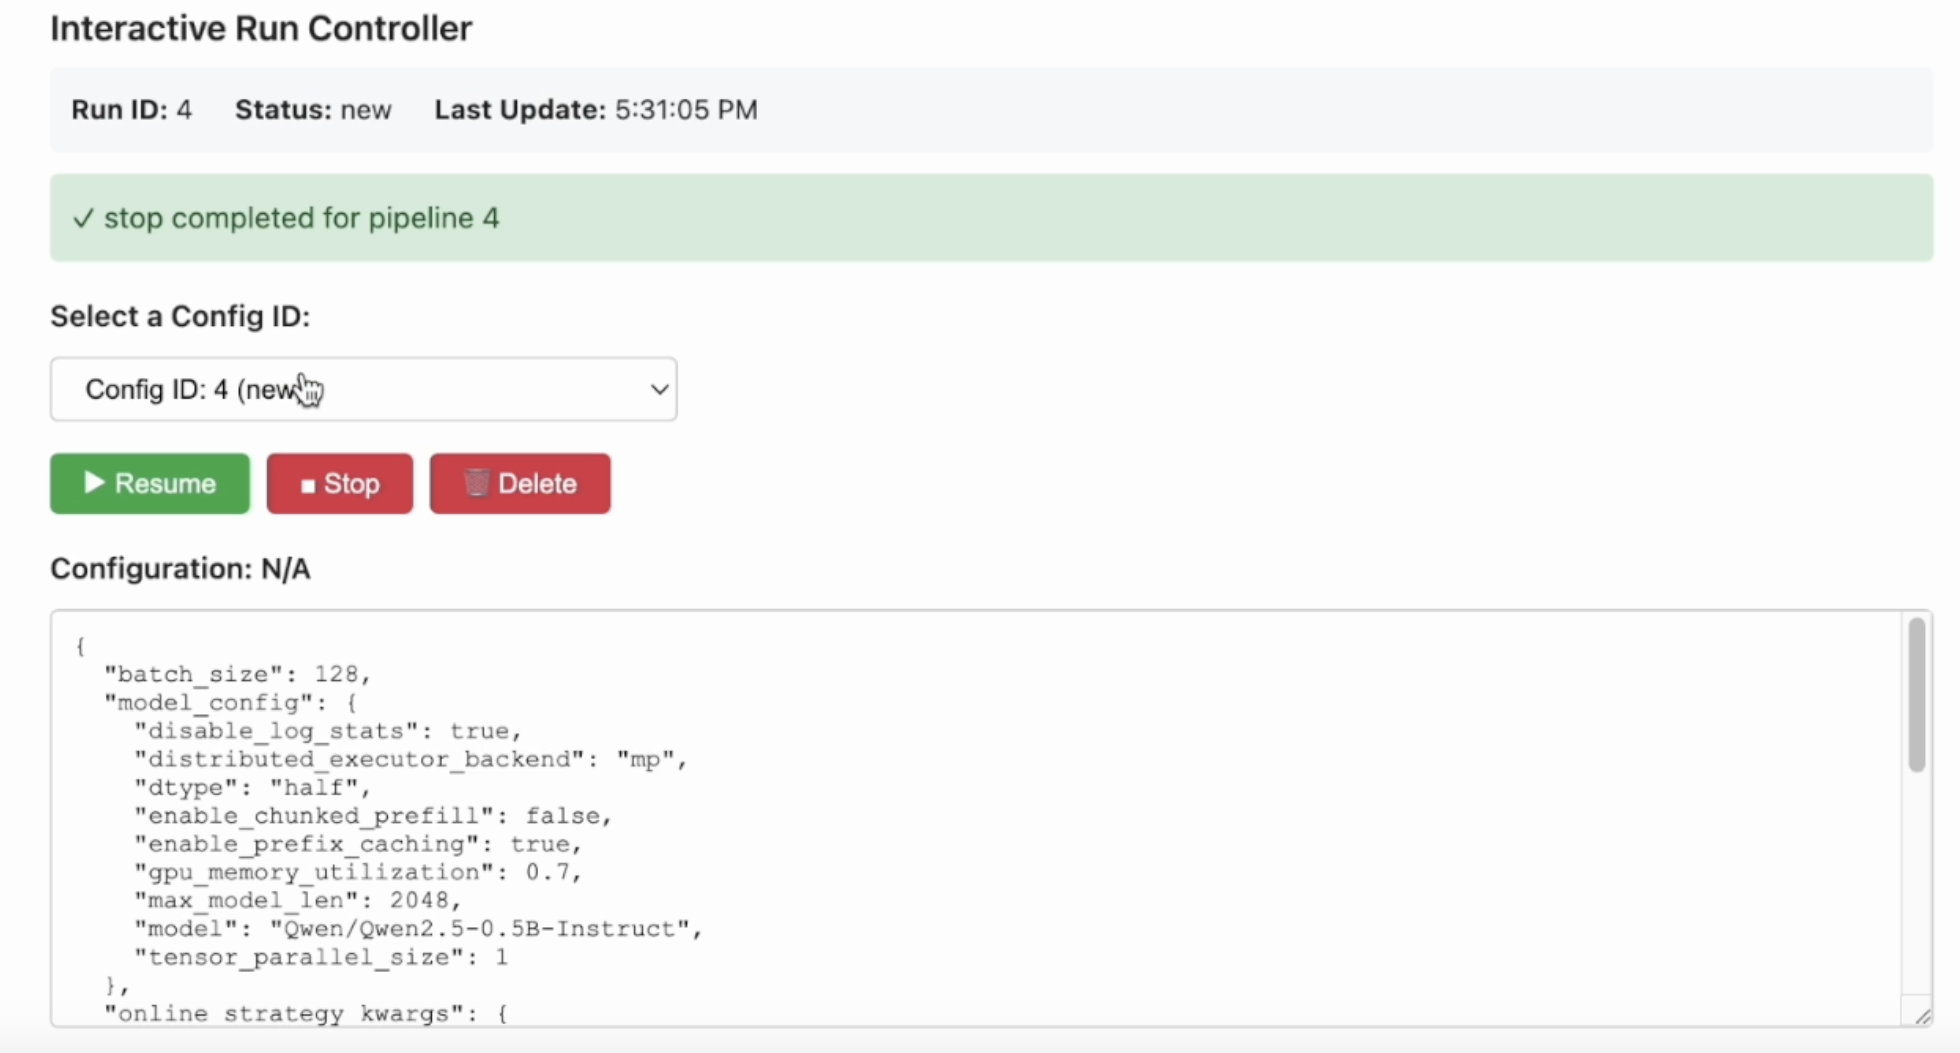
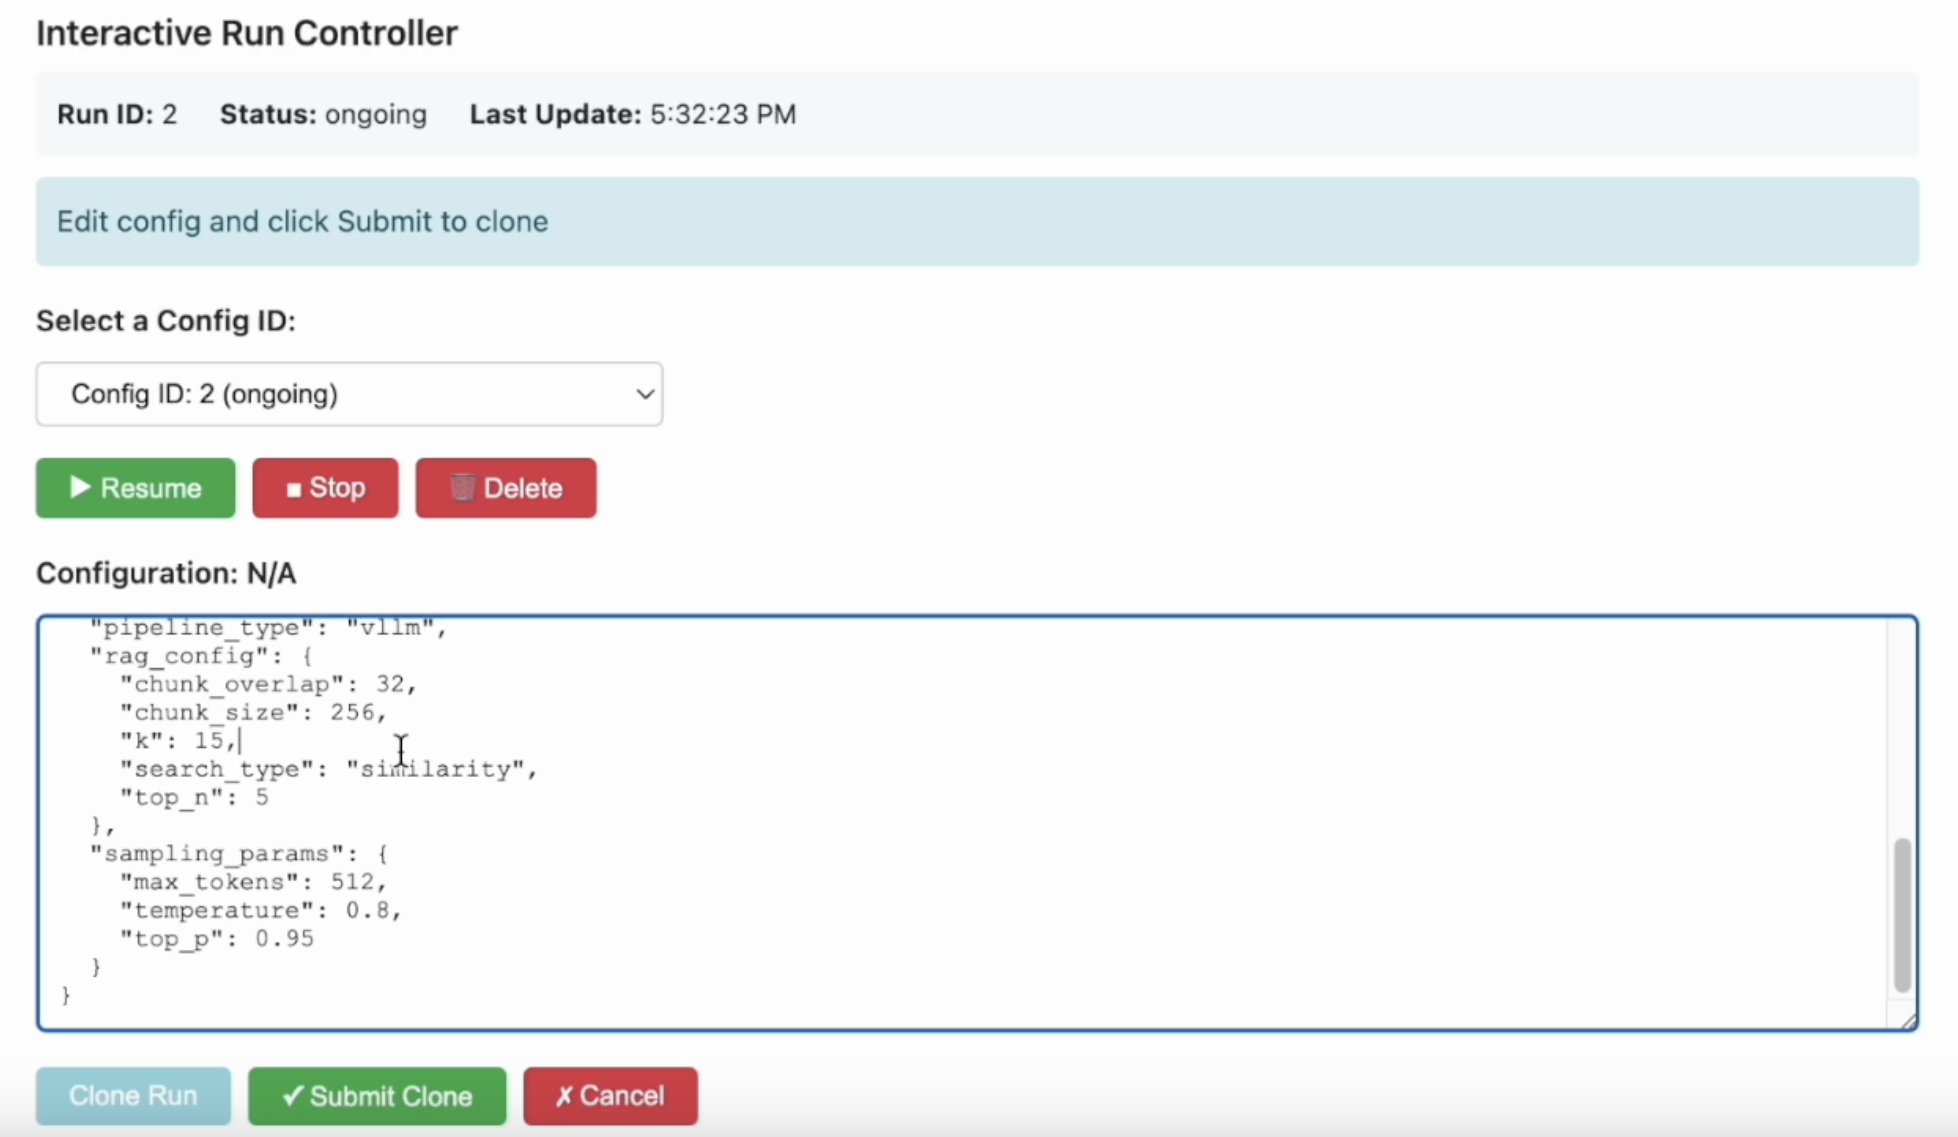
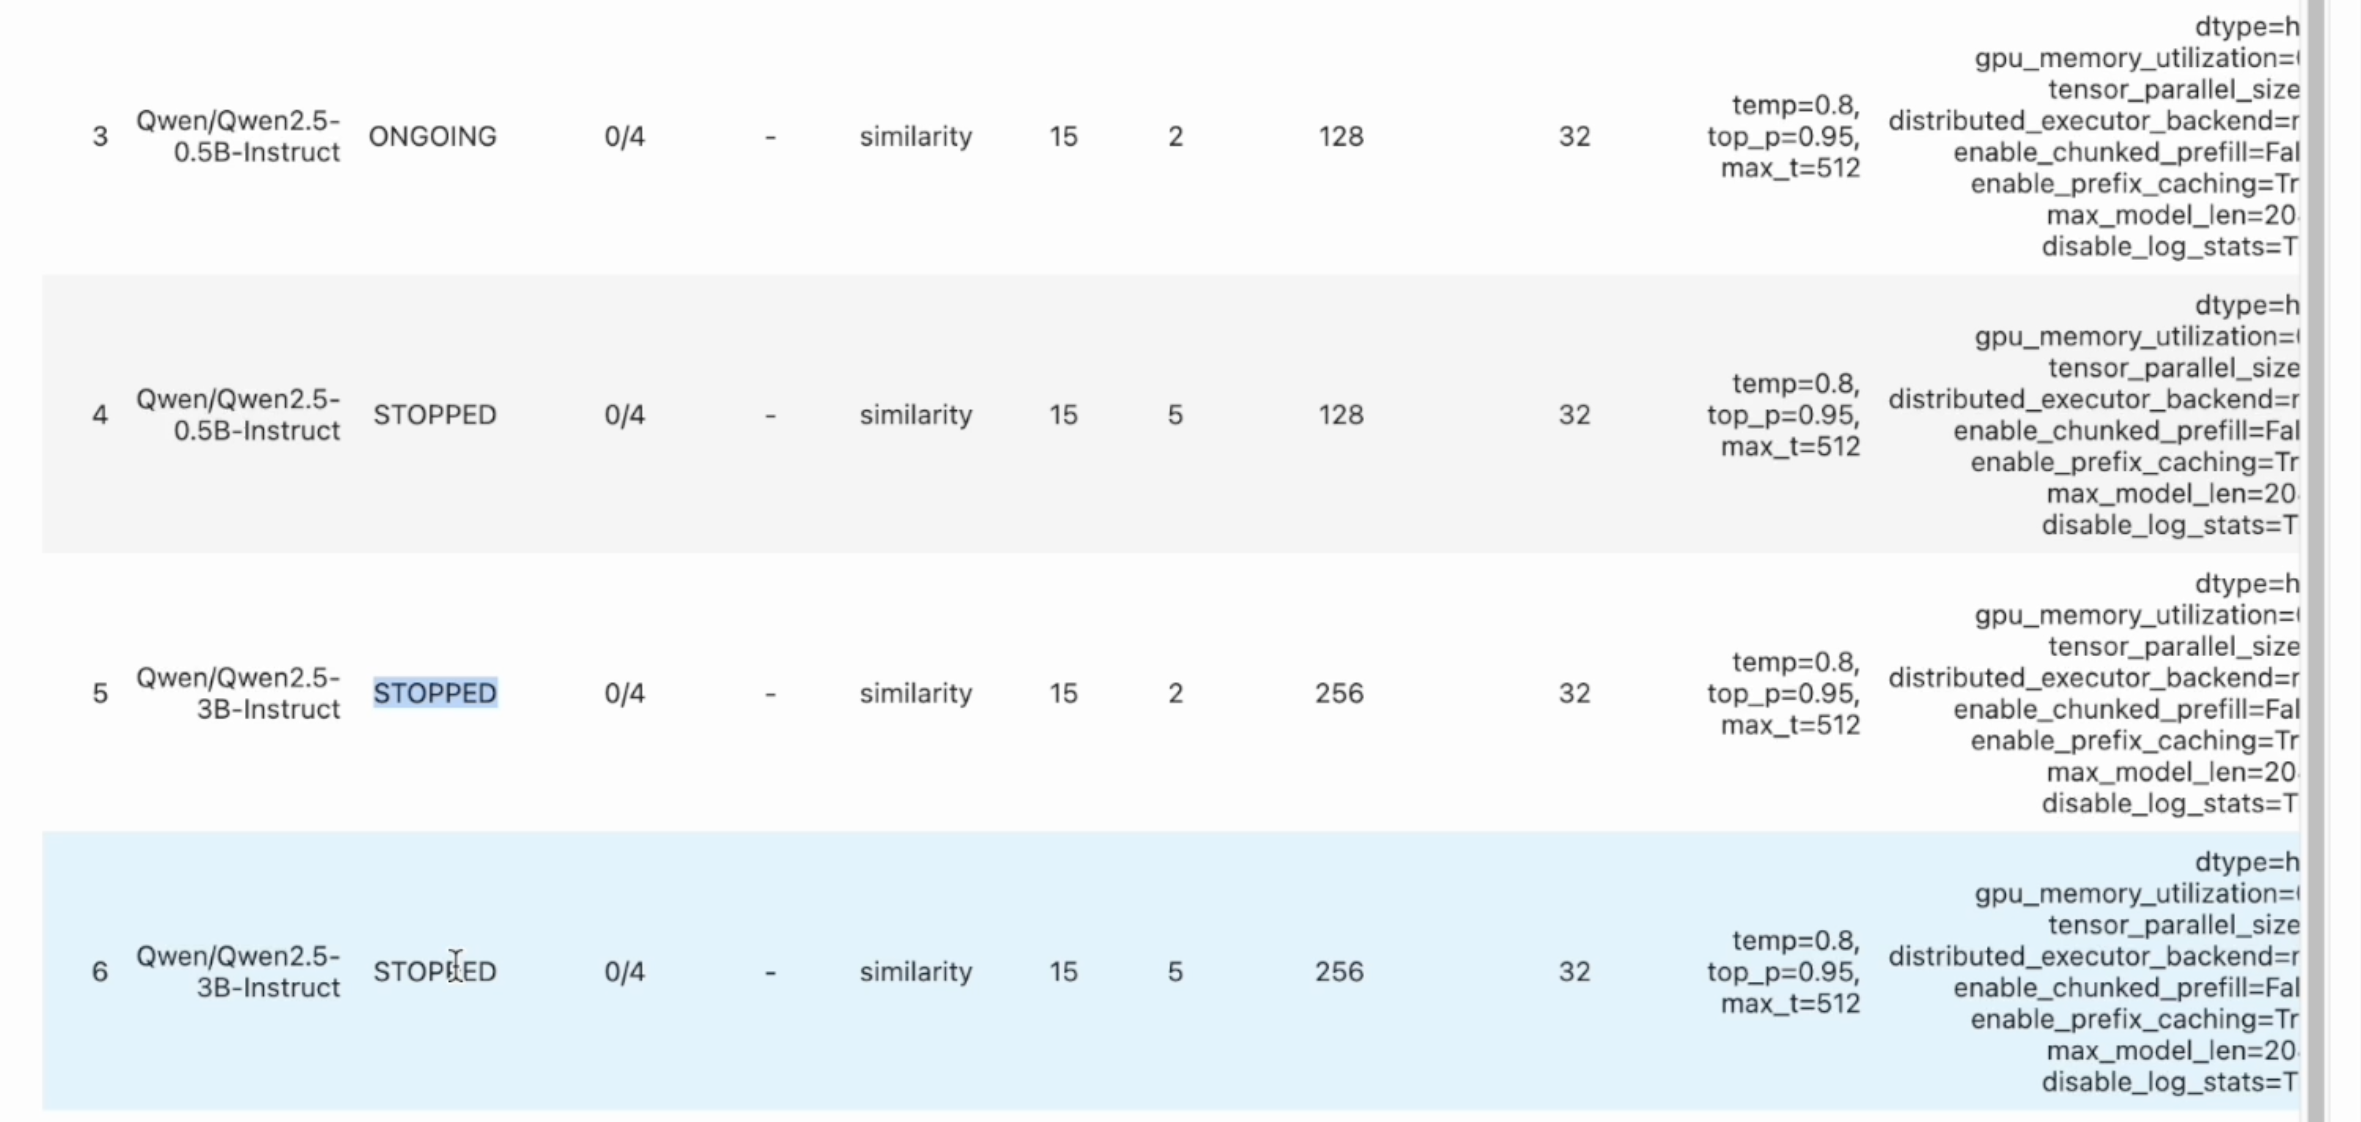
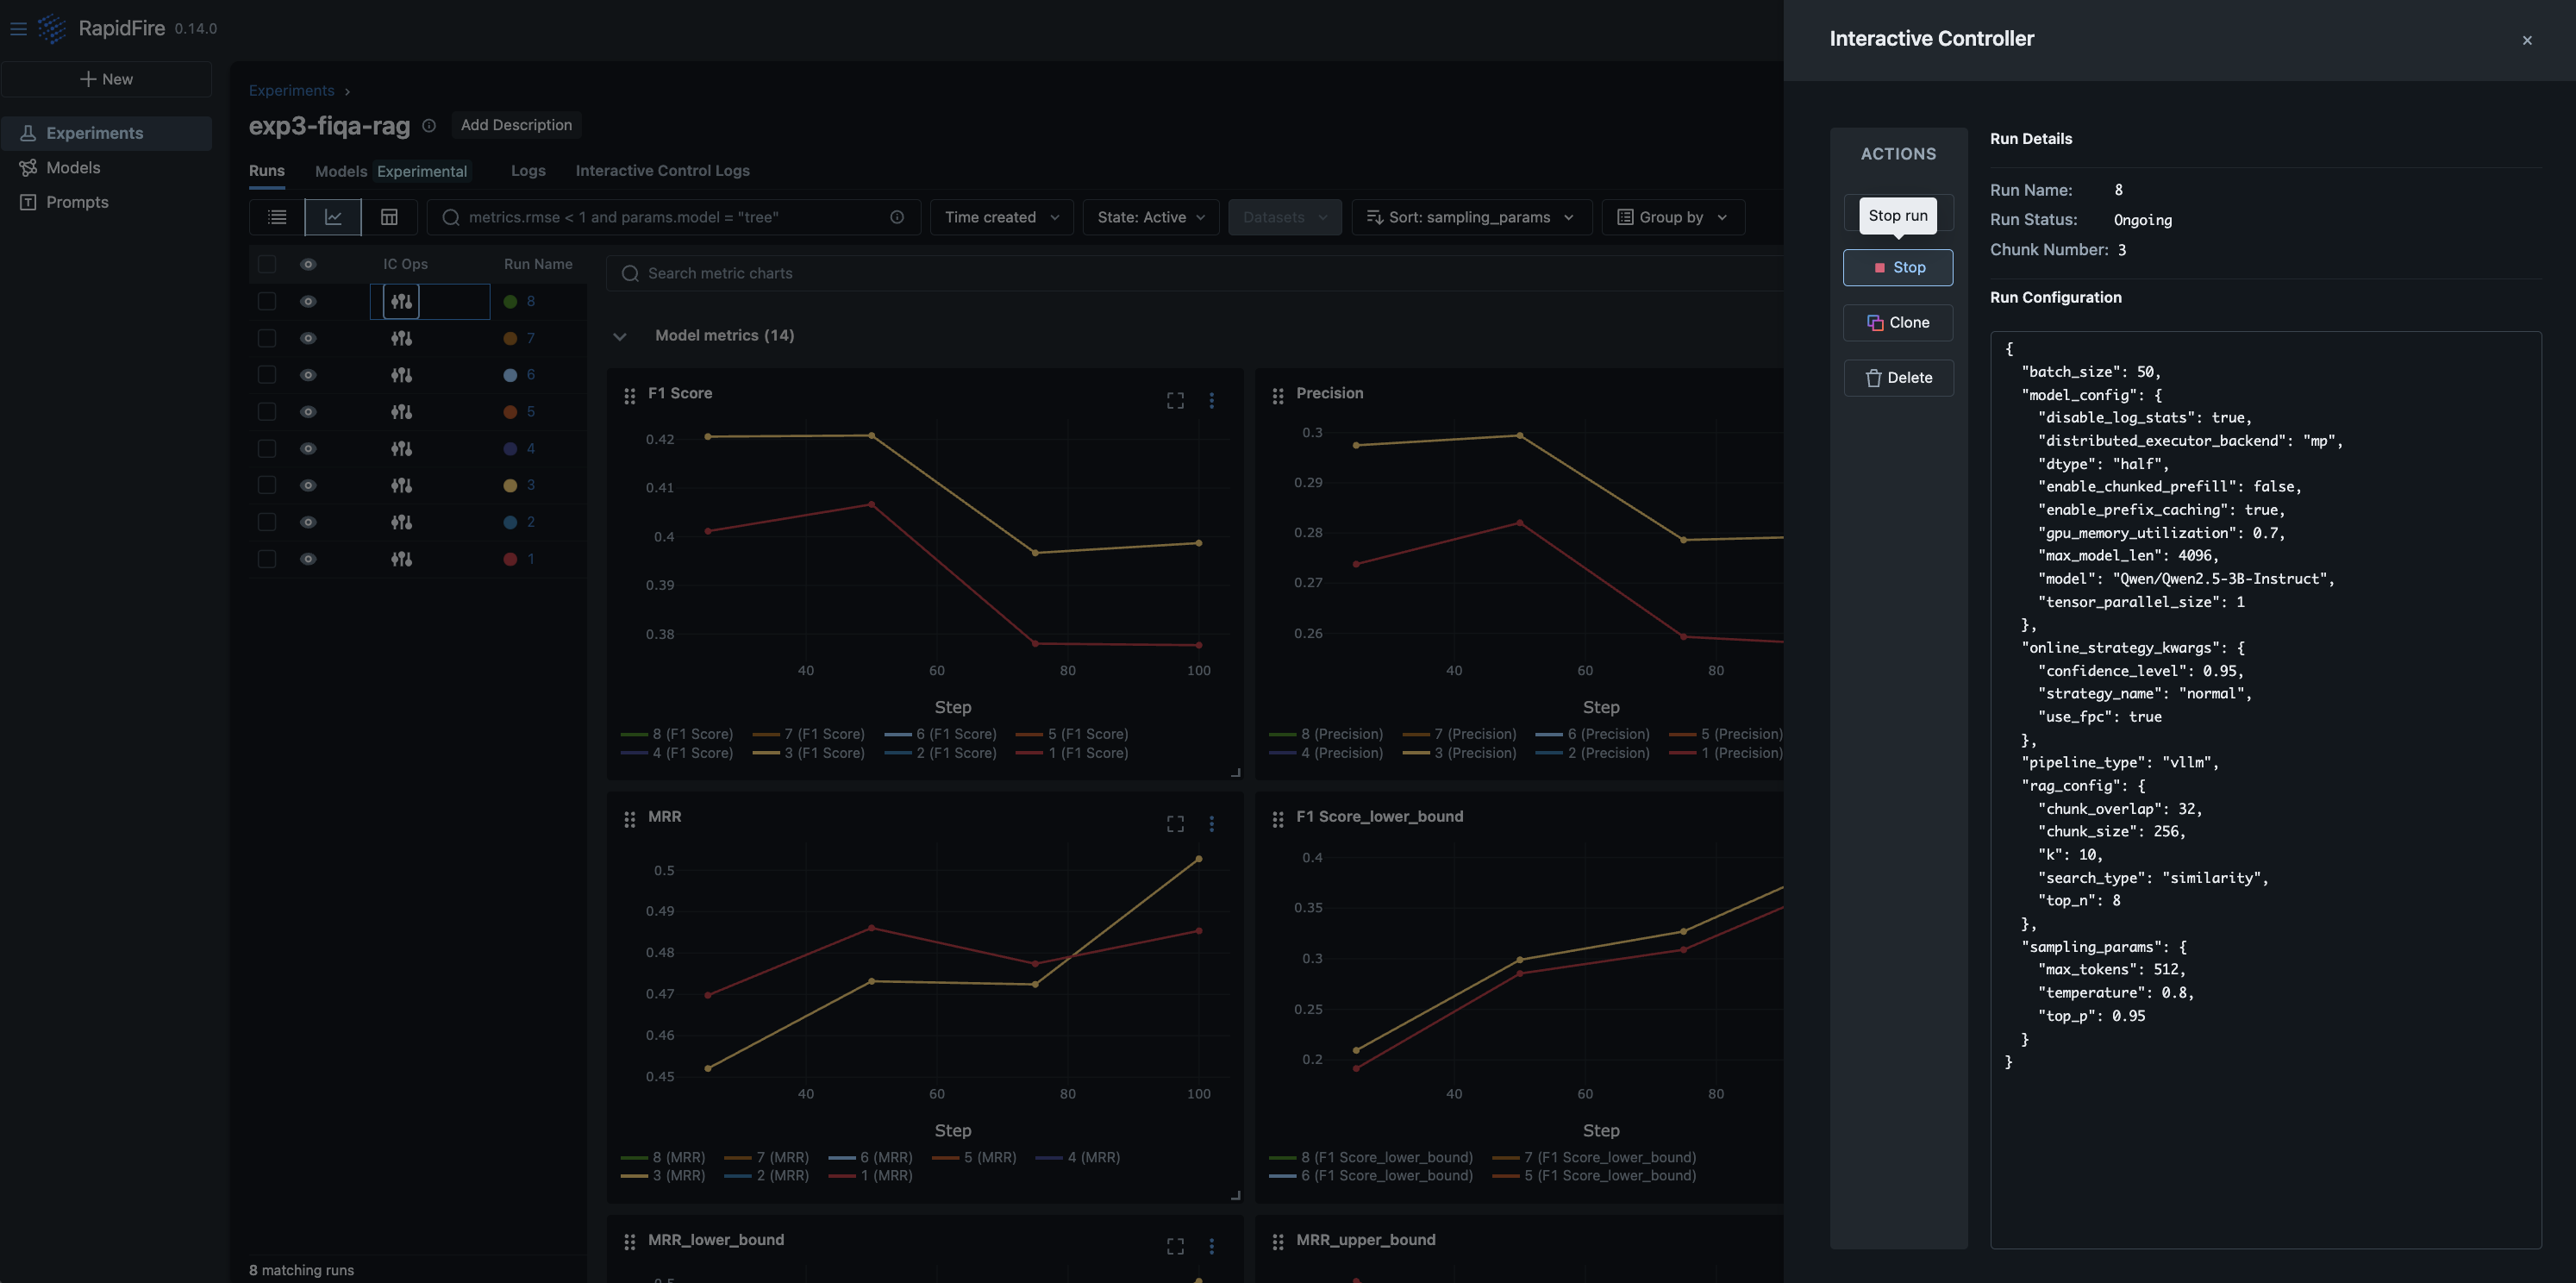
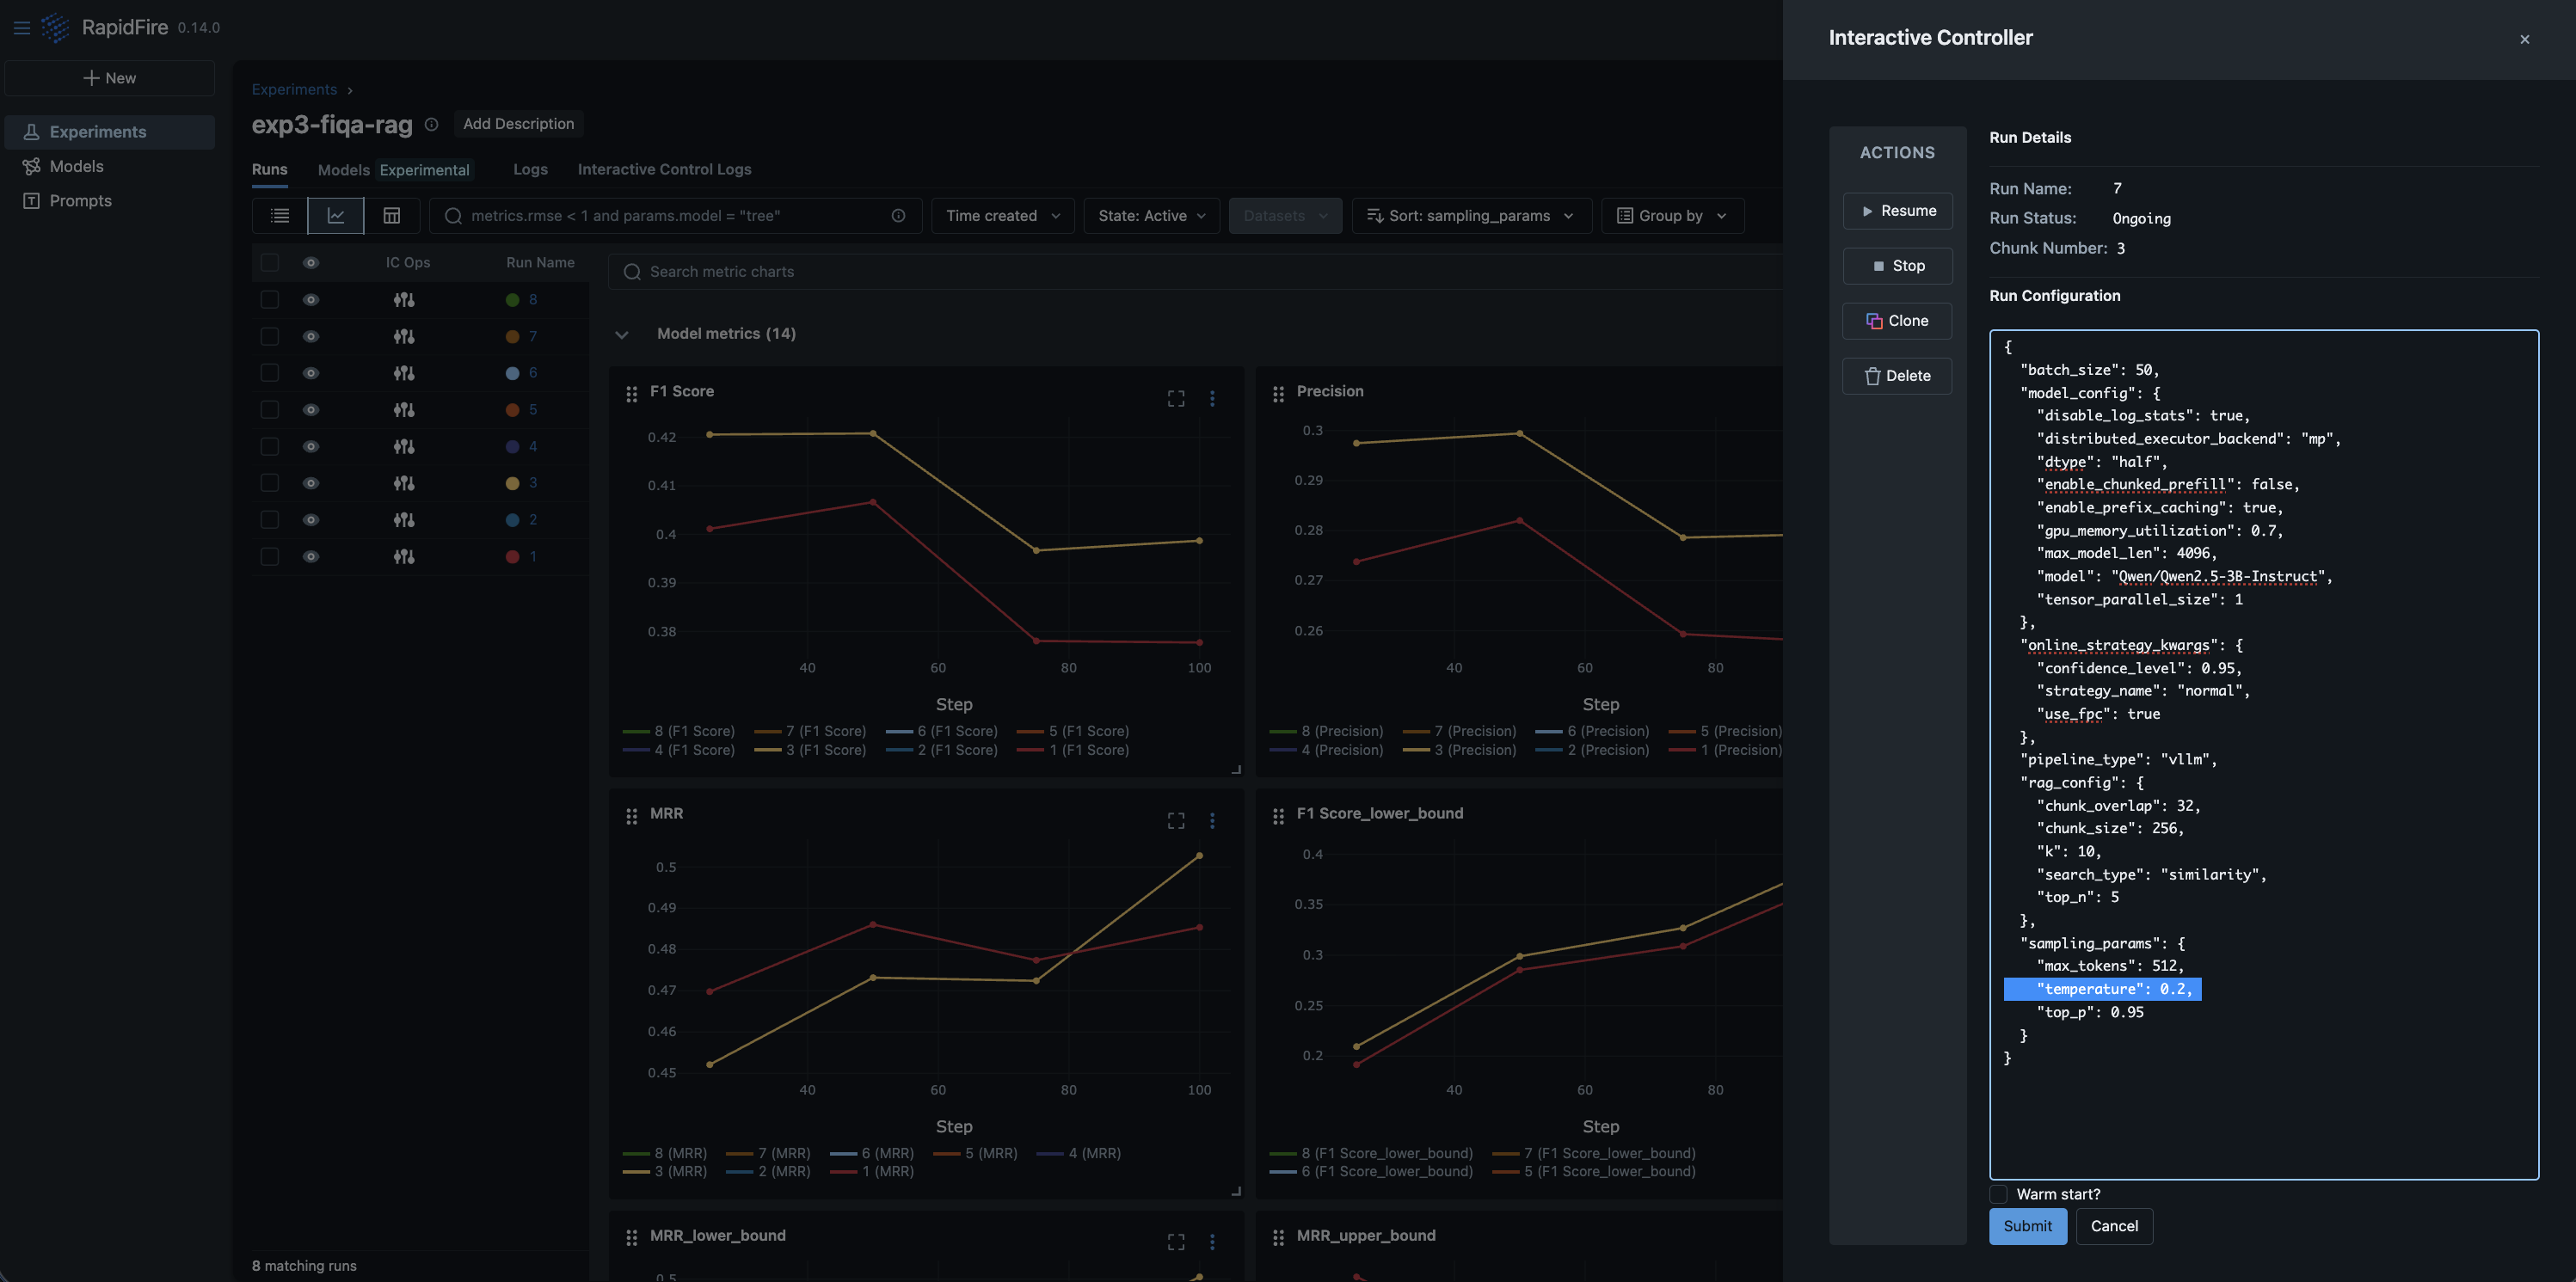
Step 6: Interactive Control (IC) Ops: Stop, Clone-Modify; check their results
You can run IC Ops either from the in-notebook IC Ops panel or from the dashboard’s IC Ops panel.
Step 7: Inspect results, end experiment, check logs; stop server when done
Run the cell to print some entries of the evals results and/or view the log files. End the expeirment after you are done with it.
You can then move on to another (named) experiment in the same session.
Run as many experiments as you like; each will have its metrics apppear on its own table under the run_evals() cell.
All experiment artifacts (metrics files, logs, checkpoints, etc.) are persistent on
your machine in the experiments path specified in the constructor.
When you are done overall, gracefully stop the RapidFire AI session and free the ports used in one of two ways:
Press Ctrl+C on the terminal where
rapidfireai startwas performed. Wait for all services to finish cleanly.In a separate terminal tab, run the stop command as follows and wait for it to finish fully. If you had run the start command as a background process, feel free to run the stop command in the same terminal tab.
rapidfireai stop
Important
If you kill the rapidfireai server forcibly without graceful stopping as above, you might lose some experiment artifacts and/or metadata.
Note
Of course, if you did not even start the server in Step 2 since it is optional, there is no need to run the stop command here.
Step 8: Venture Beyond!
After trying out the tutorial notebooks, explore the rest of this docs website, especially the API pages for RAG and context engineering. Play around more with IC Ops and/or run more experiments as you wish, including changing the prompt schemes, generator models and its knobs, chunking / reranking / retrieval knobs, and eval metrics definitions.
You are now up to speed! Enjoy the power of rapid AI customization with RapidFire AI!